
Home renovations are exciting yet challenging projects that require careful planning and organization. One of the most practical solutions for managing your belongings during a renovation is using portable storage containers. These versatile containers offer both convenience and security, allowing homeowners to temporarily store their possessions while ensuring the renovation process runs smoothly. This guide explores the benefits, practical tips, and key considerations for utilizing portable storage containers during home renovations.
Why Choose Portable Storage Containers?
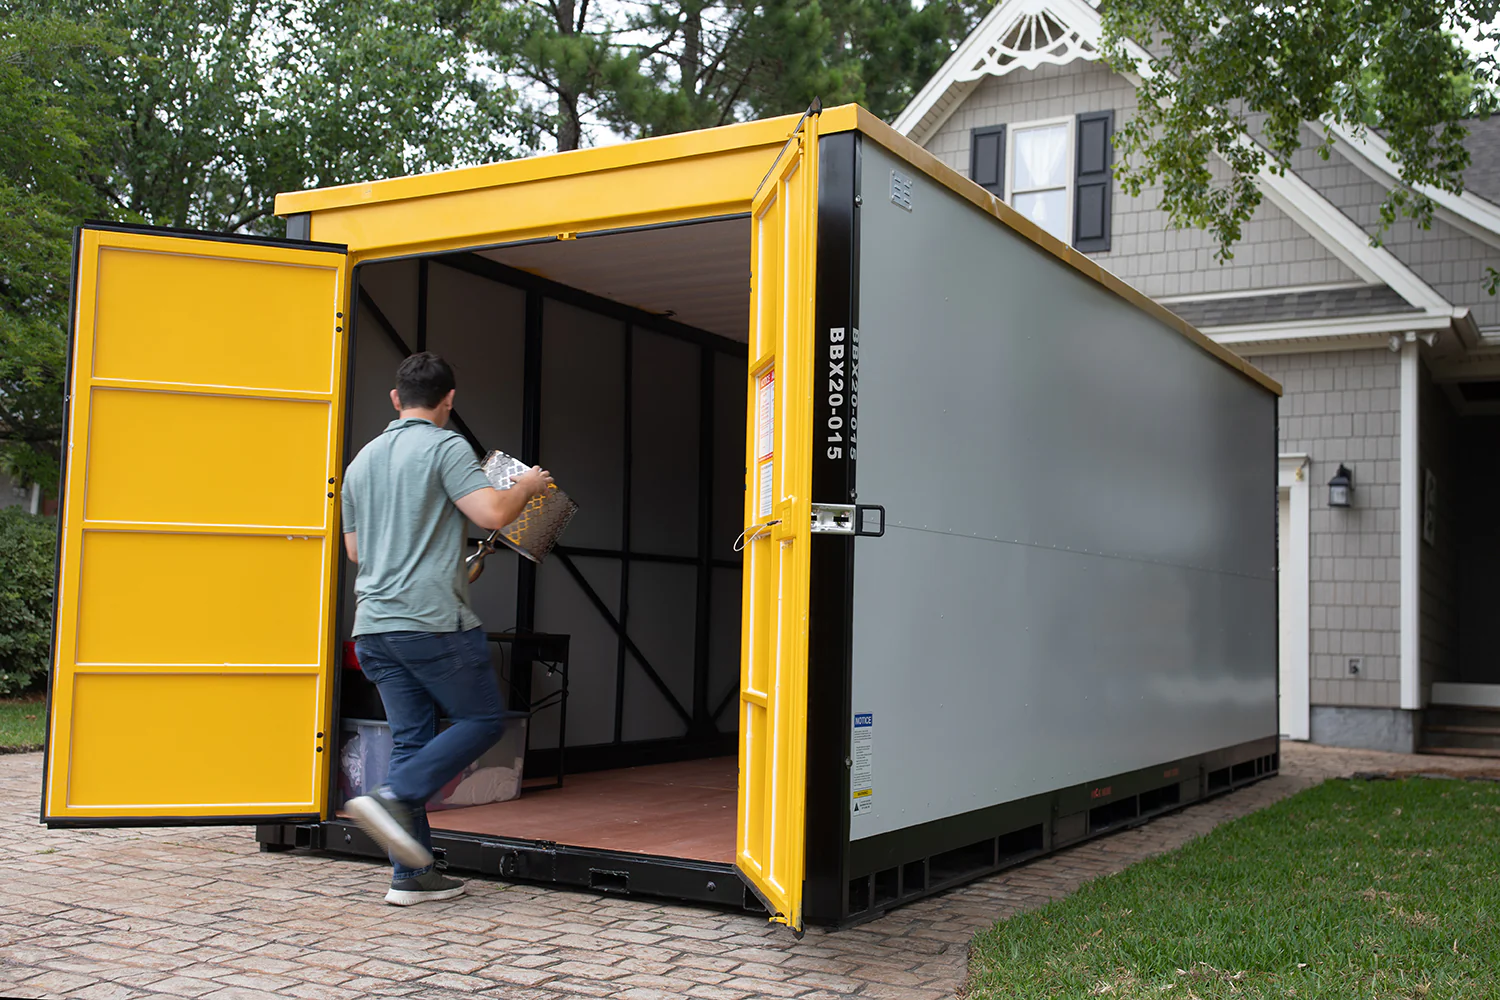
Portable storage containers provide a flexible and efficient way to store items during a renovation. Unlike traditional storage units, these containers can be delivered directly to your home, allowing for easy access and the convenience of packing and loading at your own pace. Whether you’re remodeling a kitchen, bathroom, or undertaking a full-home renovation, portable storage containers offer several advantages:
- Convenience: The container is delivered to your doorstep, eliminating the need to transport your items to a separate storage facility.
- Flexibility: You can choose the size and duration of the rental, ensuring it fits your specific renovation timeline.
- Security: Portable storage containers are designed with durability and security in mind, protecting your belongings from weather elements, theft, and damage.
- Space Efficiency: These containers are spacious enough to store large furniture, appliances, or other household items, reducing clutter and giving contractors the space they need to work.
Choosing the Right Portable Storage Container
Selecting the appropriate portable storage container depends on several factors, including the scope of your renovation and the amount of items you need to store. Here are some key points to consider:
- Size of the Container: Portable storage containers typically come in different sizes, ranging from small (e.g., 8 feet) to large (e.g., 16 feet or more). Be sure to assess how much space you’ll need to store your items comfortably. It’s always better to choose a slightly larger container to avoid cramming your belongings.
- Duration of the Rental: Consider the length of your renovation project when choosing a rental duration. Some companies offer short-term rentals for a few weeks, while others provide long-term options for larger, ongoing renovations. Renting a container for the entire project can save you time and hassle in the long run.
- Accessibility: Ensure the container is placed in a location that allows easy access for loading and unloading. A driveway or a private yard is often the most convenient space for placing the portable storage container, as long as local zoning regulations allow it.
- Climate Protection: Look for containers that are weatherproof, especially if you’re storing sensitive items such as electronics or paperwork. Many portable storage containers are built to withstand rain, snow, and extreme temperatures, providing added peace of mind during your renovation.
Packing Tips for Portable Storage Containers
Once you’ve chosen the right portable storage container, packing it efficiently is key to maximizing its space and ensuring your items stay safe during the renovation. Here are some packing tips:
- Label Everything: Label boxes and items clearly so you can easily locate what you need once your renovation is complete. This will save you time and prevent unnecessary frustration when searching for essential items.
- Pack Strategically: Begin by placing larger, heavier items at the bottom of the container. Stack lighter boxes and fragile items on top, ensuring everything is securely packed to minimize shifting during transport.
- Protect Fragile Items: Use bubble wrap, blankets, or other cushioning materials to protect breakable items like glassware, electronics, and artwork. Avoid overpacking to reduce the risk of damage.
- Leave Space for Movement: While it’s important to make efficient use of space, don’t overstuff the container. Leave room for airflow and avoid cramming items too tightly to ensure everything is properly secured.
Using the Portable Storage Container During the Renovation
Once your portable storage container is packed and ready to go, it’s time to focus on your renovation. Here are some considerations for utilizing the container during the renovation process:
- Keep Essential Items Accessible: Place the most essential items (such as toiletries, cooking equipment, or tools) in a separate, easily accessible box. This will allow you to retrieve them without disturbing your packed belongings.
- Monitor the Container’s Placement: Keep an eye on the container’s placement, especially if it’s stored outside. Ensure it remains in a secure, safe location to avoid any potential damage during construction work or severe weather.
- Stay Organized: As you progress with your renovation, consider re-organizing the container periodically. As rooms are completed and cleared, you may find that some items can be returned to the house, freeing up more space in the storage container.
Conclusion
Portable storage containers are an invaluable tool for homeowners embarking on renovation projects. They provide a practical and efficient solution for storing belongings, keeping your home organized, and protecting your possessions throughout the renovation process. By selecting the right size container, packing strategically, and ensuring proper placement, you can streamline your renovation efforts and create a smooth transition back to your newly renovated home. With the convenience and security portable storage containers offer, you’ll have peace of mind and more time to focus on the exciting changes ahead.
